Easy Same Day Sourdough Loaf Recipe
There’s something truly magical about the aroma of freshly baked bread wafting through your home and the product of this easy same day sourdough loaf recipe is no exception. It’s a scent that evokes warmth, comfort, and the promise of a delicious meal to come. And while the idea of baking bread from scratch might seem daunting to some, fear not! I’m here to introduce you to the wonderful world of same day sourdough – a simple, rustic delight that you can whip up in your own kitchen, from scratch.
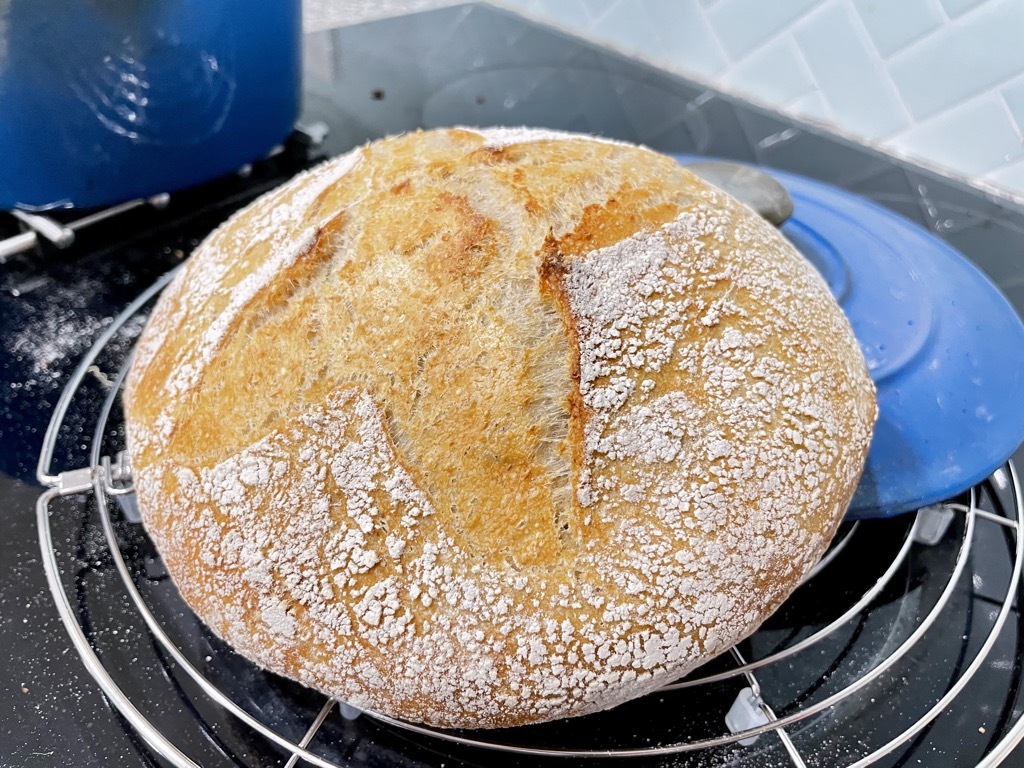
Now, before we dive into the process, let’s talk a bit about what makes sourdough bread so special. Unlike traditional bread recipes that rely on commercial yeast, sourdough bread uses naturally occurring wild yeast and bacteria. This gives it a distinct tangy flavour and a wonderfully chewy texture. Sourdough bread is often easier to digest than commercial bread, making it a favourite among many home bakers and those with sensitive tummies.
Simple pleasure
The beauty of this easy same day sour loaf recipe lies in its simplicity and efficiency. While traditional sourdough recipes require days of fermentation and proofing, this same day version allows you to enjoy freshly baked bread in just a few hours. It’s the perfect option for those days when you crave the satisfaction of homemade bread but don’t have the time or patience to commit to a lengthier baking process.
To start your same day sour loaf adventure, you’ll need just a few basic ingredients: flour, water, salt, and, of course, your active sourdough starter. If you’re new to sourdough baking, don’t worry – creating and maintaining a sourdough starter is easier than you might think. It’s essentially a mixture of flour and water that captures wild yeast and bacteria from the environment, allowing you to harness their leavening power in your bread. So the only thing to make sure of is to feed your starter as soon as you get up. Put it in a warm place to help it bubble up as soon as possible.
Once you have your starter ready to go, it’s time to mix up your dough. The process is wonderfully tactile – there’s something deeply satisfying about feeling the dough come together beneath your fingers. As you knead and shape the dough, you’ll notice its texture transforming from sticky and shaggy to smooth and elastic. It’s a hands-on experience that connects you to centuries of bread baking tradition. If you’re short on time, please don’t shy away from using a stand mixer to bring the dough together.
Ready to bake
After your dough has had a chance to rest and rise, it’s time to shape it into a loaf and give it a final proof before baking. This is where you can get creative – whether you prefer a classic round loaf or a more rustic, free-form shape, the choice is yours. As your loaf bakes in the oven, your kitchen will be filled with the irresistible scent of freshly baked bread, building anticipation for that first glorious bite.
And finally, the moment of truth arrives – it’s time to slice into your freshly baked sourdough loaf and revel in its simple, rustic perfection. The crust crackles satisfyingly beneath your knife, giving way to a soft, pillowy interior with just the right amount of tanginess. Whether enjoyed slathered with your favourite spread, served with grilled grapes, a crunchy carrot salad or paired with a delicious bowl of courgette or butternut squash soup, each bite is a testament to the joys of home baking.
An instant mod booster
But perhaps the true magic of a same day sour loaf lies not just in its delicious taste and texture, but in the sense of accomplishment it brings. There’s something deeply satisfying about creating something beautiful and nourishing with your own two hands – something that feeds not just the body, but the soul as well. In a world filled with fast food and pre-packaged convenience, taking the time to bake bread from scratch is a small act of rebellion – a way of slowing down and savoring the simple pleasures of life.
So, the next time you find yourself craving the warmth and comfort of freshly baked bread, why not give an easy same day sour loaf recipe a try? With just a handful of ingredients and a few quick steps, you can create a delicious masterpiece that will delight your senses and bring a little slice of rustic charm to your kitchen.
Tools you need
Small bowl to feed your starter
Large mixing bowl
Stand mixer
Kitchen scales
Wooden spoon
Proofing basket or small bowl and tea towel for dough to rise
Tea towel
Bread lame or sharp knife
Dutch oven for baking
Wire rack
Ingredients
- Active sourdough starter
- White bakers flour or another favourite of yours
- Salt
- Water
How to bake an Easy Same Day Sourdough Loaf
Start early in the morning by giving your sourdough starter a little love. I take around 60g out of my large jar of fridge kept starter and feed it in a separate bowl. This allows me to only feed the exact amount I need. It also avoids me having a huge jar of discard to get through. Once measured, feed your starter with equal parts flour and water and let it sit until it’s nice and bubbly. This usually takes about 4-6 hours, depending on the temperature of your kitchen. If you are unsure of your starter being ready yet, take a small amount and place it in a glass of water. Once your starter floats, it’s ready. If it sinks, give it a bit longer.
Once your starter is all bubbly and happy, it’s time to mix up the dough. In a large bowl, combine the bubbly starter, flour, water, and salt. Using a dough hook, mix everything together until your dough passes the windowpane test. If you are not familiar with the term – it involves stretching a small piece of dough until it forms a thin, translucent membrane. This indicates that the gluten has developed sufficiently for proper structure and texture in the finished bread.
Once your dough is nice and smooth, turn your stand mixer off and remove the bowl. Keep your dough in the bowl for the time being. Cover it with a kitchen towel and let it rise on the kitchen bench for about 3 hours, or until it’s doubled in size.
Shaping your same day sourdough loaf
After the dough has had its rise, sprinkle a chopping board or your clean kitchen bench with flour. Take your dough out of the bowl, place it on the floured surface and gently shape it into a nice, round loaf.
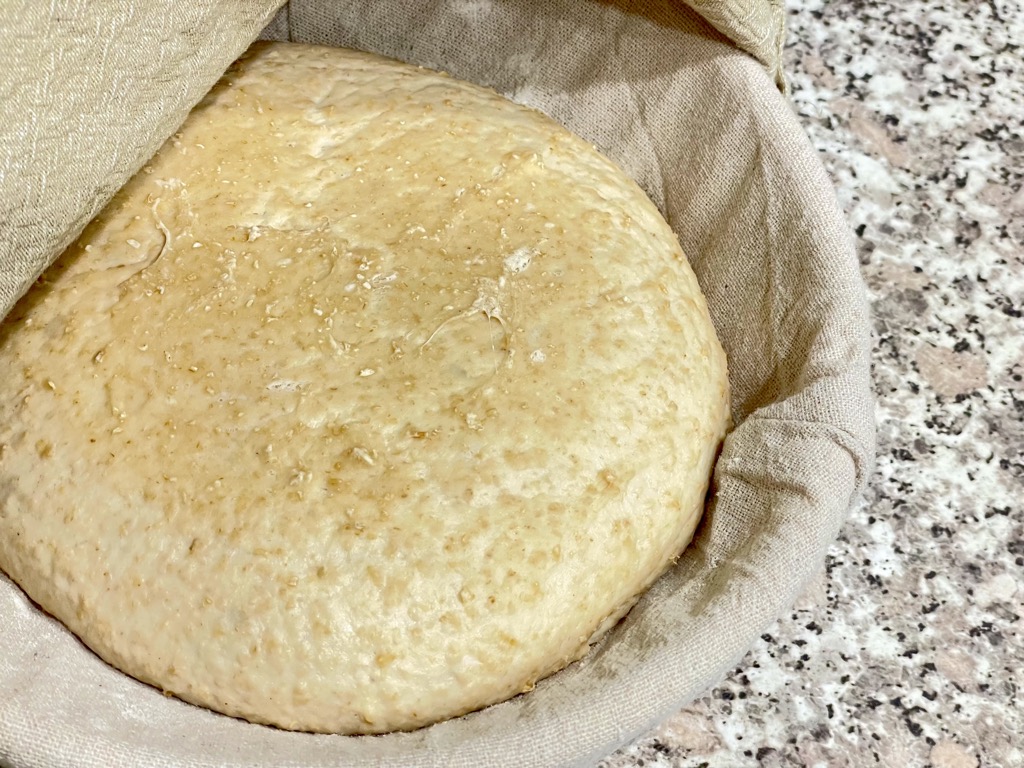
Add flour to your proofing basket or a bowl lined with a clean kitchen towel. Rub the flour all over the fabric until it is slightly coated in flour. Place the dough into the bowl with the bottom or “ugly” part of the ball on top. Cover the bowl with a clean kitchen towel and place it on the kitchen bench to rise for another 2-3 hours, until about doubled in size.
When your loaf is almost done rising, preheat your oven to 240 degrees Celsius (about 475 degrees Fahrenheit). Place your dutch oven including lid into the oven while it is heating up. This will allow for a hot baking dish and the ideal environment for your loaf.
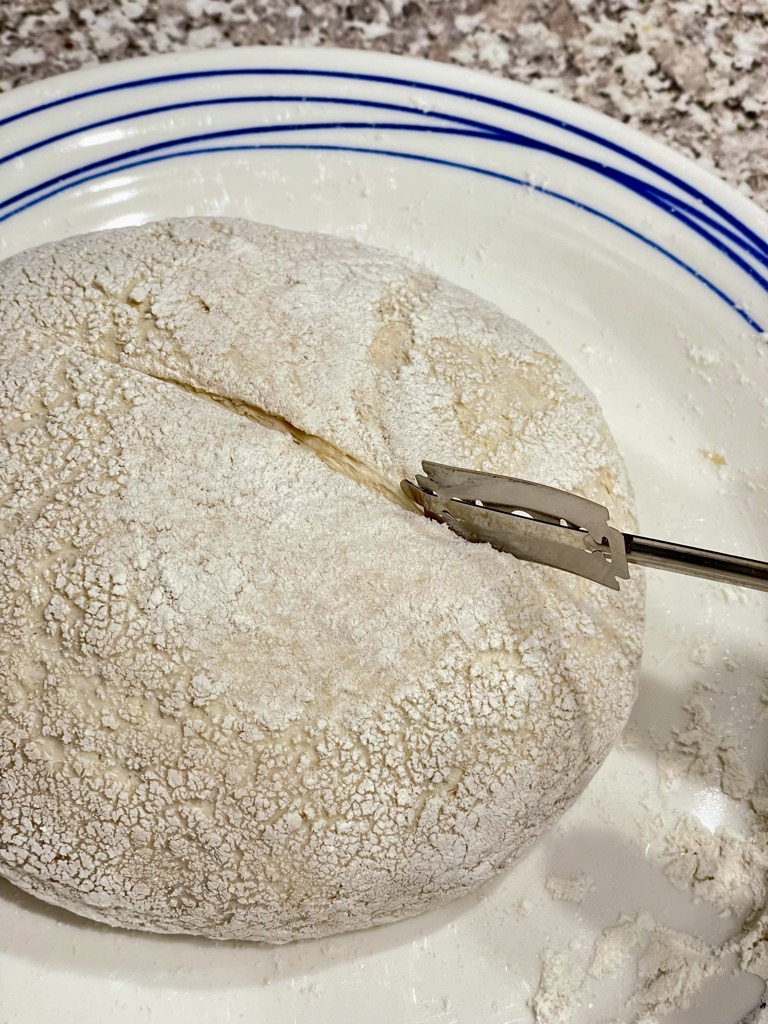
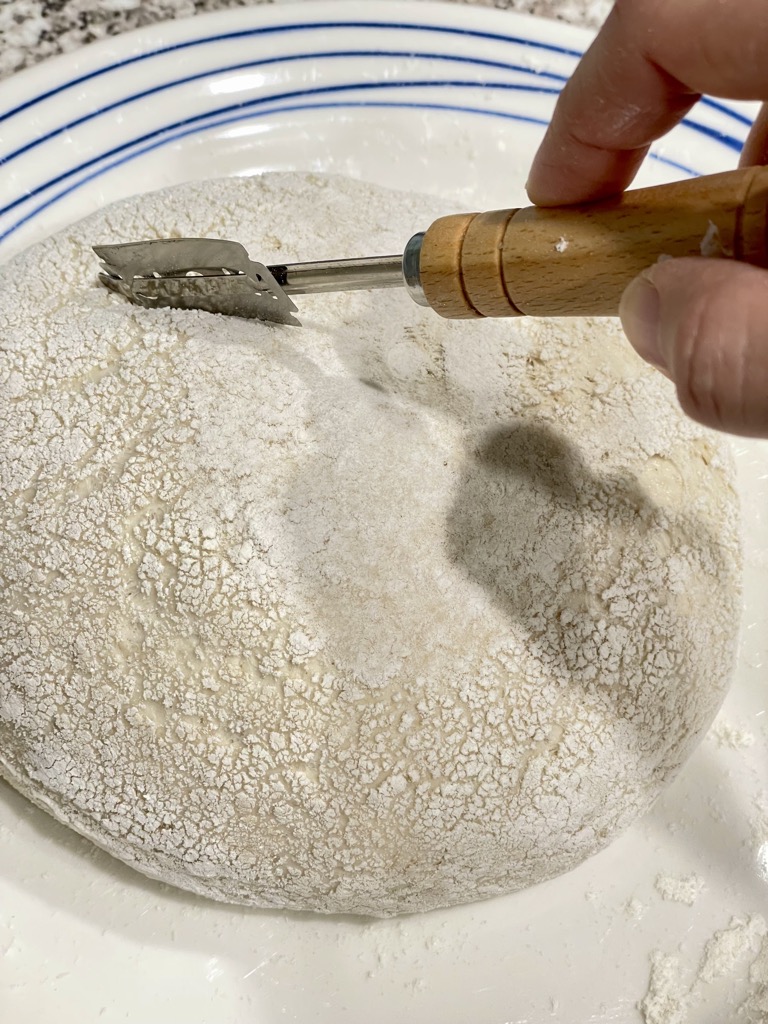
While the oven is heating up, carefully remove the dough from the proofing basket and transfer it to a chopping board. Using a bread lame, sharp knife or razor blade, score the top of the loaf with a few shallow slashes. This will help the loaf expand in the oven and give it that beautiful artisanal look. If you are new to sourdough baking, try a single long line or cross in the middle of your loaf.
Ready to bake
Now for the fun part! Once your oven hits 240 degrees, place the loaf in a preheated Dutch oven and cover it with the lid. Bake for 20 minutes, then remove the lid and bake for an additional 10 minutes, or until the loaf is golden brown and crusty. To test, give the bottom of your loaf a knock. It should sound evenly hollow if baked through.
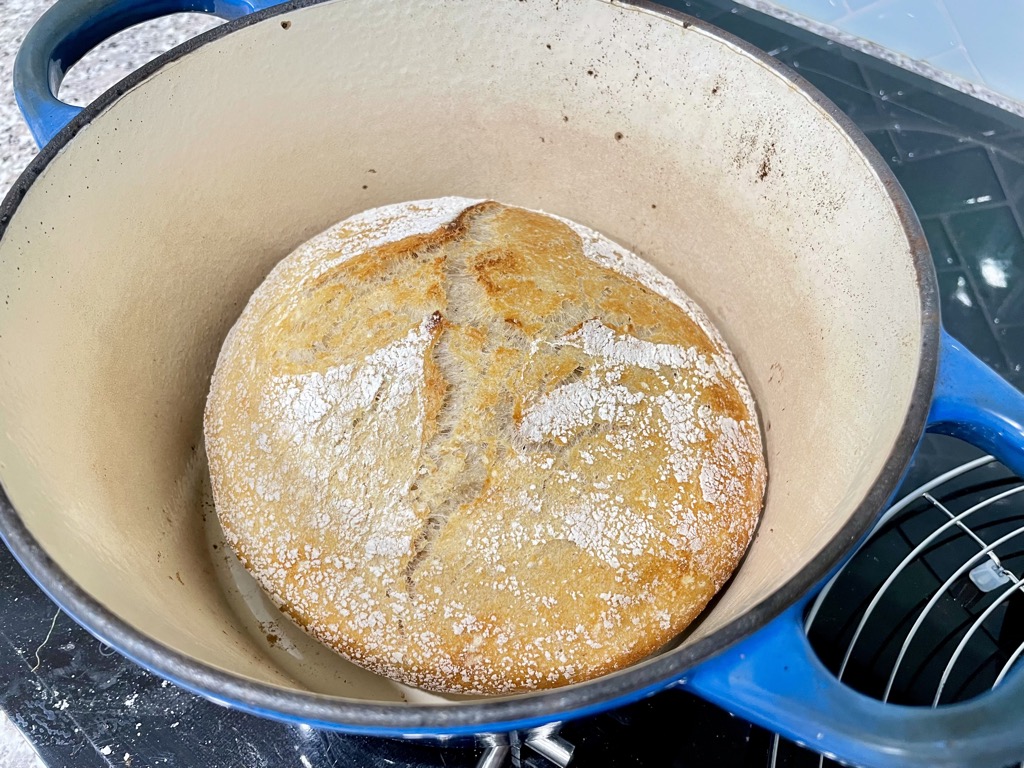
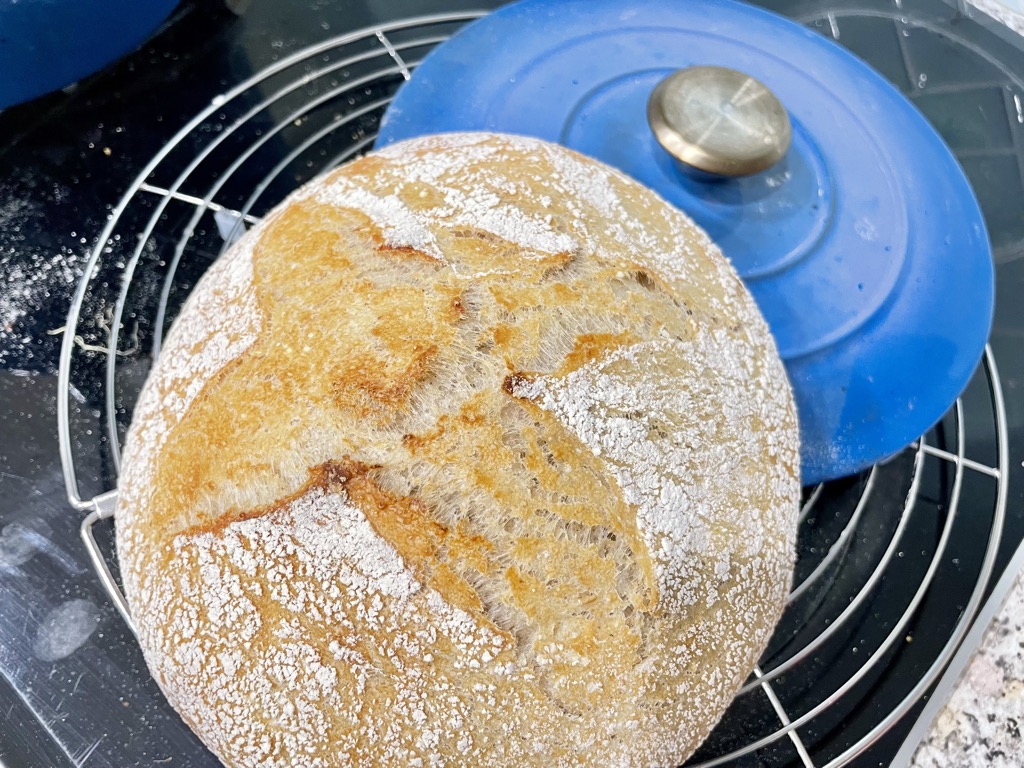
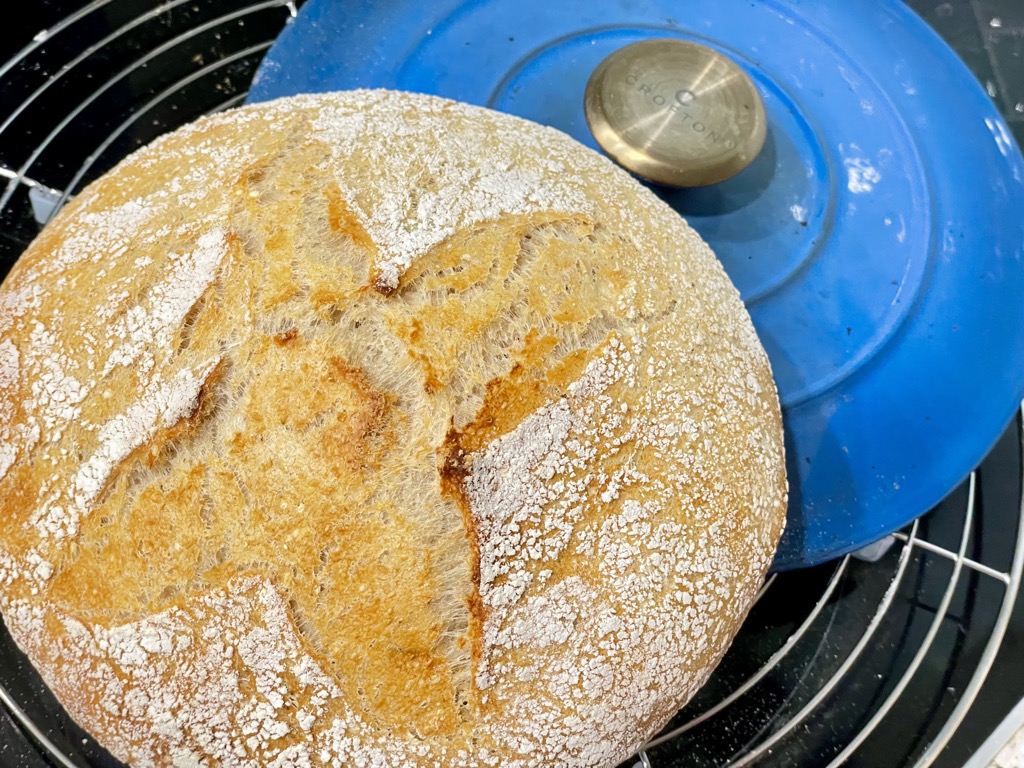
Once your loaf is done baking, transfer it to a wire rack and let it cool completely before slicing into it. I know, waiting is the hardest part, but trust me, it’s worth it! By now it should be close to dinner time. Slice it up and enjoy your homemade, super easy same day sourdough loaf with your family over rosemary infused carrot soup or any of the other dishes mentioned above. Bon appétit!
Tips for making this Easy Same Day Sourdough Loaf Recipe
- While the above amount of water seems to work well for the type of flour I use, you may want to start with a little less and add more water as your dough comes together. As a general rule of thumb, I add just enough water for my dough to “slip” in the bowl.
- If you are using a “thirsty” flour, the amount of water mentioned in the recipe may not be enough. Continue to add a little water until your dough becomes quite sticky at first, and then allow your stand mixer to work its magic and bring it all together.
- Rye flour is incredibly nourishing for your sourdough starter. Every once in a while, when my starter looks a little flat, I feed my starter with Rye flour to bring it back to life.
- I like to keep sourdough baking pressure-free and feed only a small amount of starter ahead of baking. This avoids me having a huge amount of active starter or discard I won’t use in time. Simply take a third of the amount of starter you need out of your starter jar and feed it in a small bowl to achieve the full amount and reduce waste.
Frequently asked questions
Is rye or whole wheat better for sourdough?
Both rye and whole wheat can be used to make delicious sourdough bread. The choice depends on your personal preference. Rye flour tends to create a denser, darker loaf with a stronger flavor, while whole wheat flour adds a nuttier taste and slightly denser texture compared to white flour. Experiment with both to find what you prefer in terms of taste and texture.
Can you use wholemeal rye flour for sourdough starter?
Yes, you can absolutely use wholemeal rye flour to create a sourdough starter. Rye flour tends to be more active in fermentation compared to wheat flour, which can help kickstart your sourdough culture. Just keep in mind that rye flour absorbs water differently than wheat flour, so you may need to adjust your feeding ratios accordingly.
Can I use rye flour instead of whole wheat for sourdough?
You absolutely can, yes. Since rye flour is very thirsty your recipe quantities may need to be adjusted though. Due to its density it is also recommended to use no more than 25% rye flour in a recipe. Follow this guide until you are comfortable to cater to the special needs of increased amounts.
Is rustic sourdough bread good for you?
Rustic sourdough bread can be a healthy choice, especially if it’s made with whole grain flours like whole wheat or rye. Sourdough fermentation can make the bread easier to digest. It can also lead to a lower glycemic index compared to bread made with commercial yeast. Additionally, whole grain flours provide fiber, vitamins, and minerals that are beneficial for your health.
Can you eat sourdough bread right away?
As with any other bread or pastry, it is usually recommended to let the loaf cool before cutting into it. Sourdough is incredibly tricky to cut while it is still hot, making it stick to your bread knife of bread slicer. If you are anything like me, fresh, warm bread eaten in large amounts can also cause tummy pains, which takes away from the pleasure this freshly baked loaf would otherwise provide.
Easy Same Day Sourdough Loaf Recipe
There's something truly magical about the aroma of freshly baked bread and this easy same day sourdough loaf recipe is no exception.
Ingredients
- 160g active Sourdough Starter
- 400g White Bakers Flour
- 230g Water
- 10g Salt
Instructions
- Start early in the morning by giving your sourdough starter a little love. I take around 60g out of my large jar of fridge kept starter and feed it in a separate bowl. This allows me to only feed the exact amount I need. It also avoids me having a huge jar of discard to get through. Once measured, feed your starter with equal parts flour and water and let it sit until it's nice and bubbly. This usually takes about 4-6 hours, depending on the temperature of your kitchen. If you are unsure of your starter being ready yet, take a small amount and place it in a glass of water. Once your starter floats, it’s ready. If it sinks, give it a bit longer.
- Once your starter is all bubbly and happy, it's time to mix up the dough. In a large bowl, combine the bubbly starter, flour, water, and salt. Using a dough hook, mix everything together until your dough passes the windowpane test. If you are not familiar with the term - it involves stretching a small piece of dough until it forms a thin, translucent membrane. This indicates that the gluten has developed sufficiently for proper structure and texture in the finished bread.
- Once your dough is nice and smooth, turn your stand mixer off and remove the bowl. Keep your dough in the bowl for the time being. Cover it with a kitchen towel and let it rise on the kitchen bench for about 3 hours, or until it's doubled in size.
- After the dough has had its rise, sprinkle a chopping board or your clean kitchen bench with flour. Take your dough out of the bowl, place it on the floured surface and gently shape it into a nice, round loaf.
- Add flour to your proofing basket or a bowl lined with a clean kitchen towel. Rub the flour all over the fabric until it is slightly coated in flour. Place the dough into the bowl with the bottom or “ugly” part of the ball on top. Cover the bowl with a clean kitchen towel and place it on the kitchen bench to rise for another 2-3 hours, until about doubled in size.
- When your loaf is almost done rising, preheat your oven to 240 degrees Celsius (about 475 degrees Fahrenheit). Place your dutch oven including lid into the oven while it is heating up. This will allow for a hot baking dish and the ideal environment for your loaf.
- While the oven is heating up, carefully remove the dough from the proofing basket and transfer it to a chopping board. Using a bread lame, sharp knife or razor blade, score the top of the loaf with a few shallow slashes. This will help the loaf expand in the oven and give it that beautiful artisanal look. If you are new to sourdough baking, try a single long line or cross in the middle of your loaf.
- Now for the fun part! Once your oven hits 240 degrees, place the loaf in a preheated Dutch oven and cover it with the lid. Bake for 20 minutes, then remove the lid and bake for an additional 10 minutes, or until the loaf is golden brown and crusty. To test, give the bottom of your loaf a knock. It should sound evenly hollow if baked through.
- Once your loaf is done baking, transfer it to a wire rack and let it cool completely before slicing into it. I know, waiting is the hardest part, but trust me, it's worth it! By now it should be close to dinner time. Slice it up and enjoy your homemade, super easy same day sourdough loaf with your family over rosemary infused carrot soup or any of the other dishes mentioned above. Bon appétit!

I’m always trying new sourdough recipes, I can’t wait to try this one too!