DIY Paper Stars – How to make your own Christmas Decoration
DIY paper stars are absolutely everywhere in our home this Christmas – and honestly, I wouldn’t have it any other way. As someone who usually loves clean counters and clear surfaces, the holiday season is when I let go a bit. I go full sparkle mode! Think paper bag stars, tiny Christmas trees, vintage ornaments, and shiny bits in gold, red, and green peeking out from every corner. It’s a beautiful chaos that just feels right.

What I love most about the festive lead-up is how it becomes this beautiful excuse to slow down and get creative with the kids. Last year, we really leaned into the easy DIY paper stars trend, and it turned into a whole tradition. We’d light a few candles, put on our favourite holiday playlist (or a Christmas-themed YouTube video), and gather around the table with some paper bags, glue sticks, and hot cocoa. Pure magic.
Our girls are obsessed with crafts, and this is one of those easy crafts that doesn’t need much. It’s also a great way to repurpose old magazines, leftover construction paper, or those last bags from the grocery run that are just sitting in the cupboard. Whether you’re using origami paper, decorative paper, or a humble, plain piece of paper, the result is always uniquely charming.
So in this post, I’m sharing a little video tutorial-style guide (minus the actual video, because, you know, I’m more of a written-word kinda girl) to walk you through how to make beautiful paper star decorations in different ways. From simple strip of paper folding to full-blown 3D paper stars, there’s something for every skill level.
What You’ll Need for These DIY Paper Stars
Paper bags (or sheets of construction paper, origami paper, or decorative paper)
Scissors
Glue stick or hot glue
Black thread or twine for hanging
Christmas music or a cozy YouTube/TikTok make vibe
Optional: sparkly spray paint, inch squares of leftover paper for accent stars
How to Make Easy DIY Paper Stars
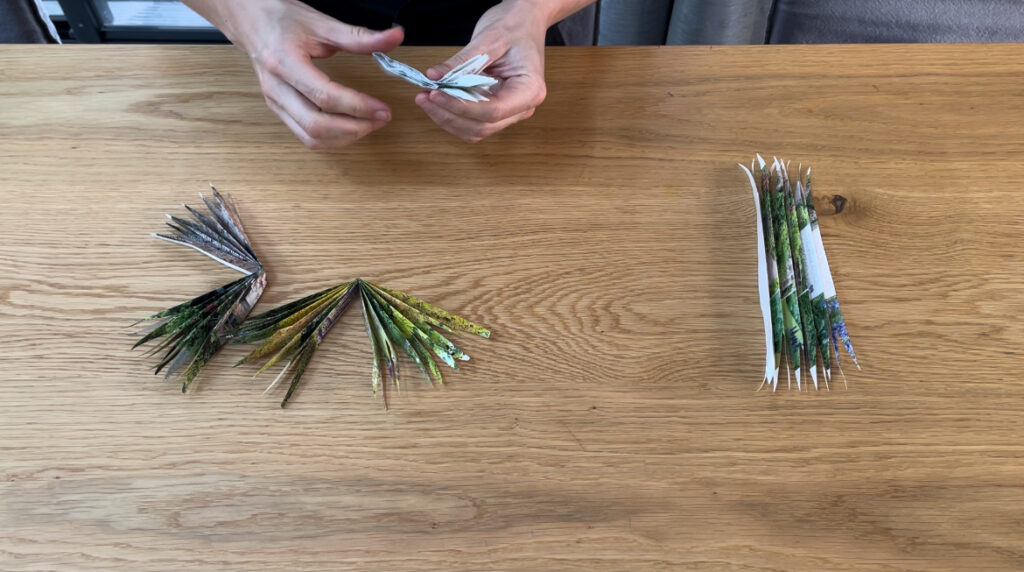
Fold in Half
Fold each harmonica-folded strip in half along the middle to help shape half of the star. This gives it that rounded 3D look when assembled.
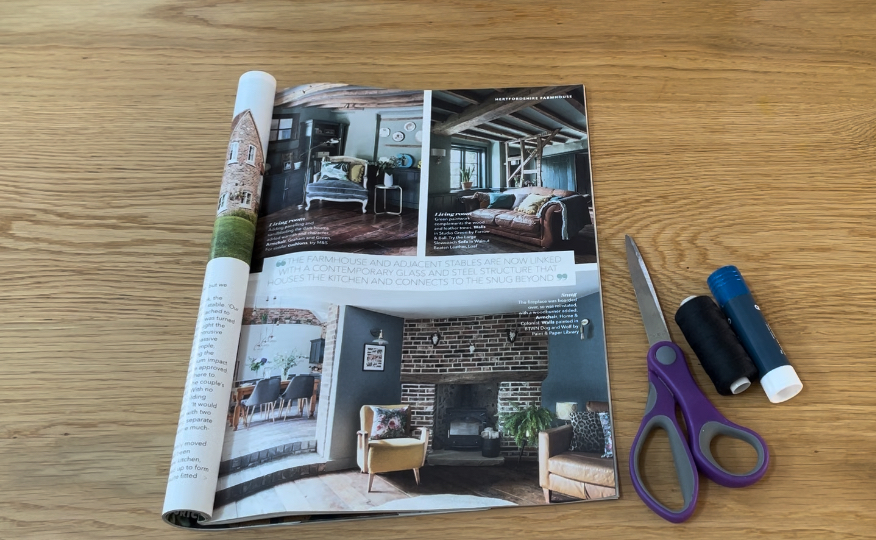
Prepare Your Paper
Take four same-sized sheets – could be from an old magazine, paper bags, or any scrap paper you have. If using paper bags, make sure to remove any handles and unfold them flat.
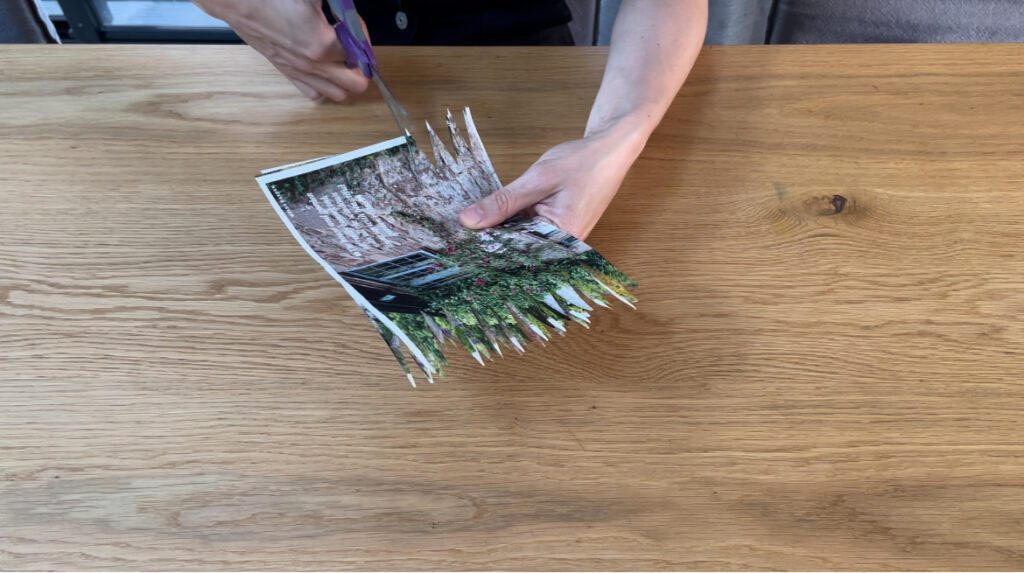
Cut for Star Points
Stack your papers and snip into the shorter ends to create triangle shapes. These will become the star points. Don’t stress if they’re uneven – different angles mean more character!
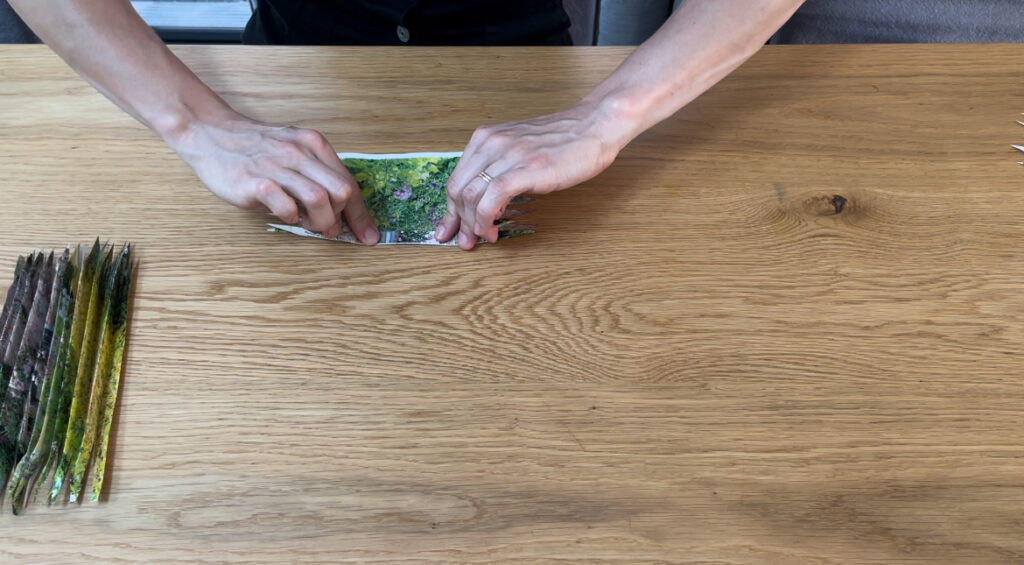
Fold the Paper
Separate the sheets and create fold lines by folding each piece into an accordion or harmonica fold. Keep the fold width the same across all sheets – about 1cm works great.
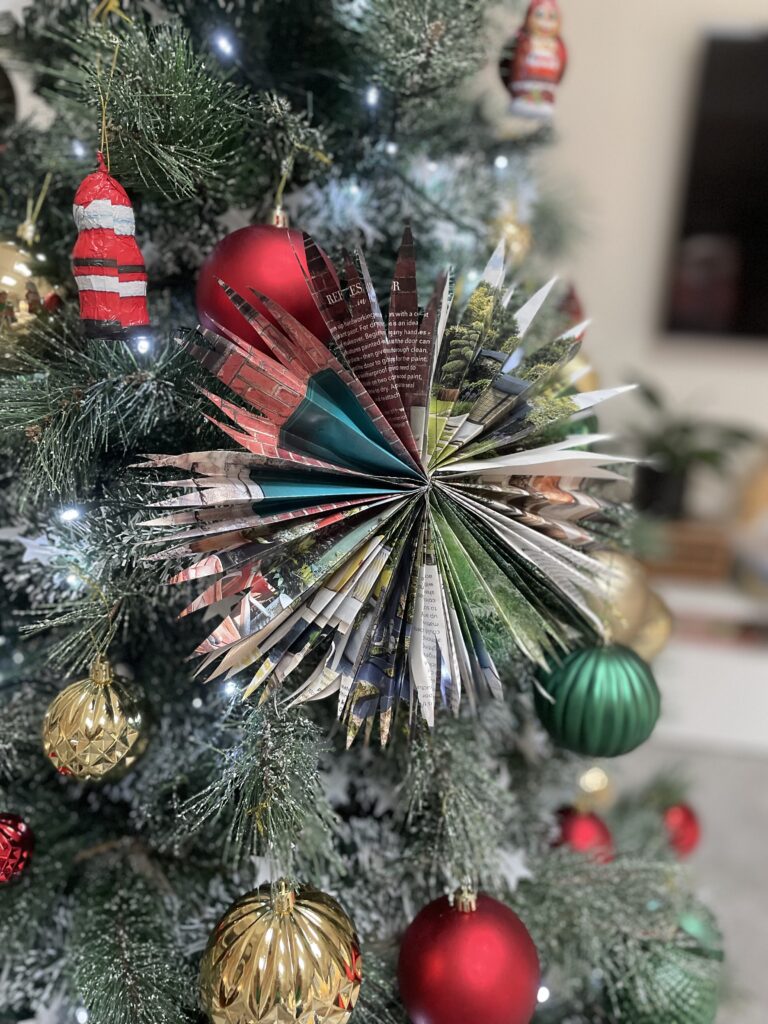
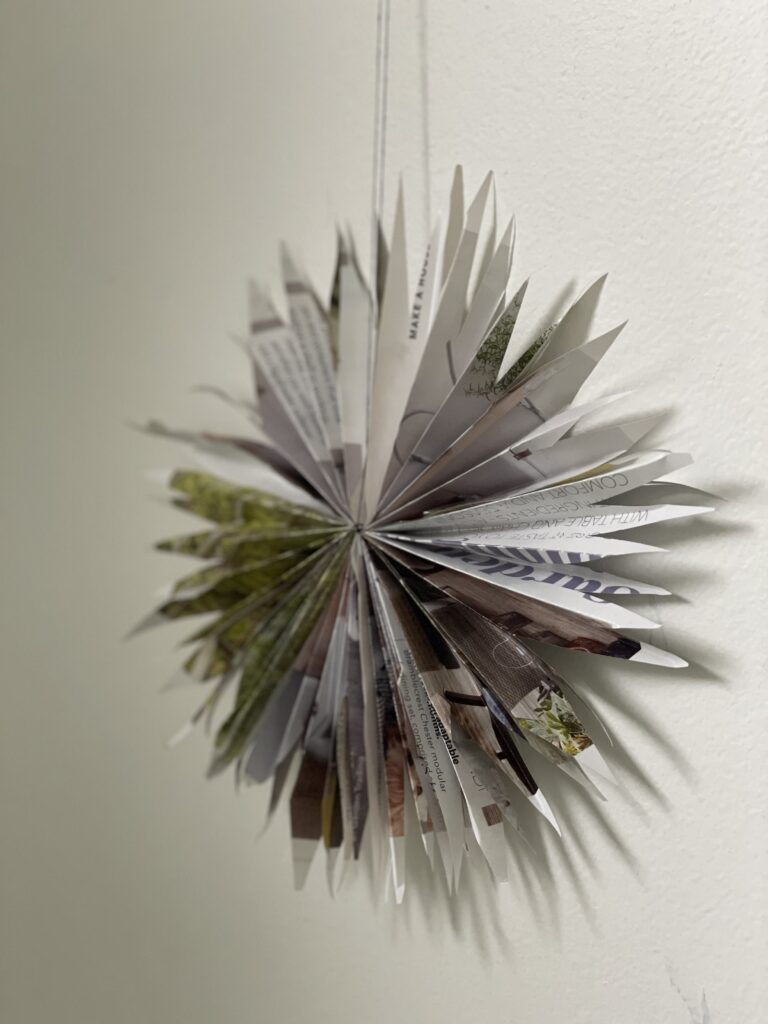
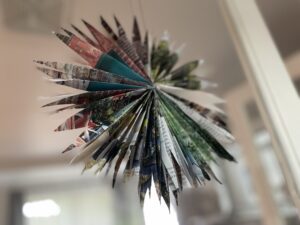
Assembling Your 3D Paper Star
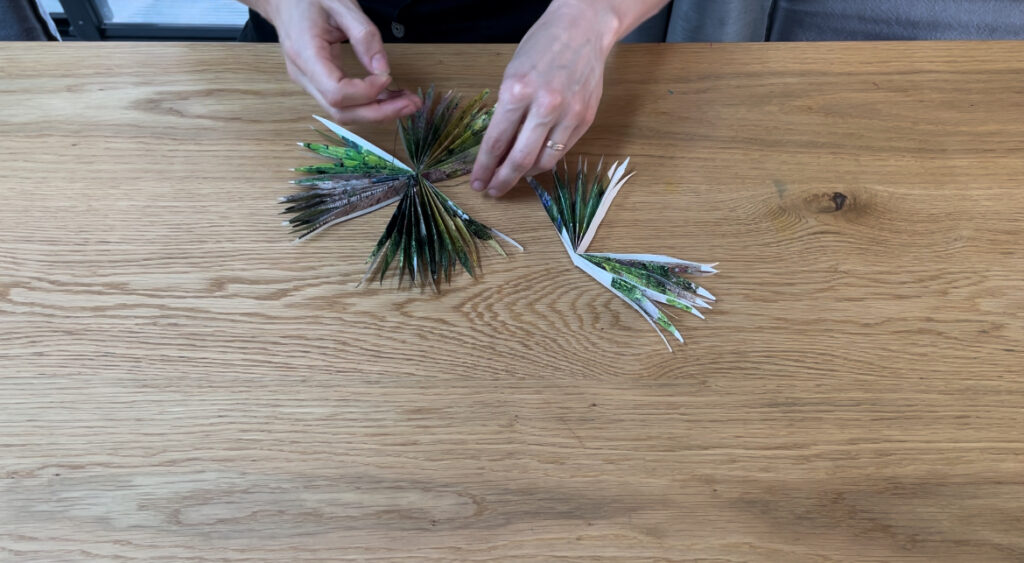
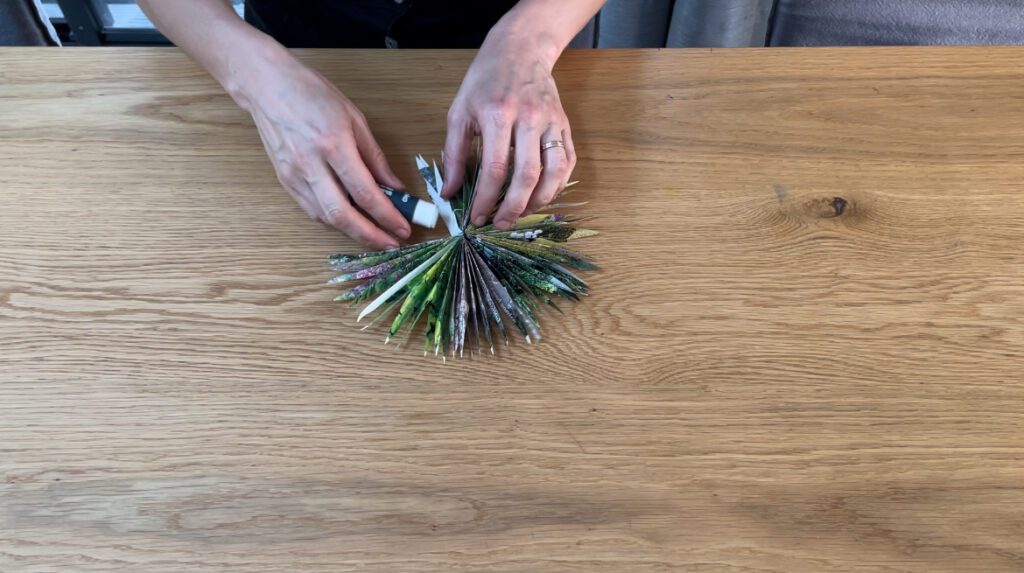
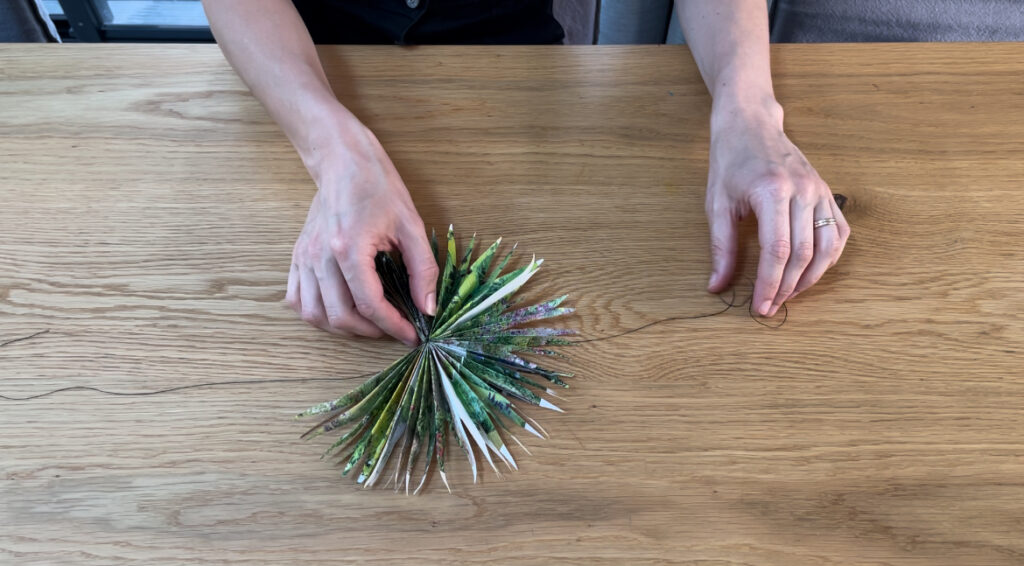
Tie the Centers
Take two folded pieces and place them tip to tip with the right side facing out. Run your thread through the center folds, tie tightly. Repeat with the remaining pieces to form a cross or snowflake shape.
Glue the Edges
Now glue the outer edges where each folded piece meets – this is what forms your full paper star. A hot glue gun works best for durability, but a glue stick will do if you’re gentle.
You can also try using sticky tape or even stitch the pieces with a needle and thread if you’re out of glue entirely.
Decorate and Display
Cut a longer piece of thread (30cm or more) and run it through the centre of the star for hanging. We love using these Christmas stars as table decor, hanging in windows, or grouped in a corner like a Pottery Barn style holiday vignette.
Want to go smaller? Use inch squares of origami paper to make origami lucky stars – they’re teeny, adorable, and perfect for your tree!
Other DIYs to try
No posts
Why You’ll Love These Paper Stars
These easy DIY paper stars are:
- Budget-friendly and made from recycled paper
- Customisable in so many different ways
- Perfect for kids and adults alike
- Great for Christmas star garlands, tree toppers, or even gift tags
We made a whole collection last year, and some of our favourite ones are still holding up beautifully. But even if something breaks? No worries – you’ve got the tools and know-how to whip up new ones in no time.
So go ahead – grab your scissors, raid your last bags of wrapping paper or old books, and make your own DIY paper star decorations. Your home is going to feel like a cozy little Christmas wonderland!