
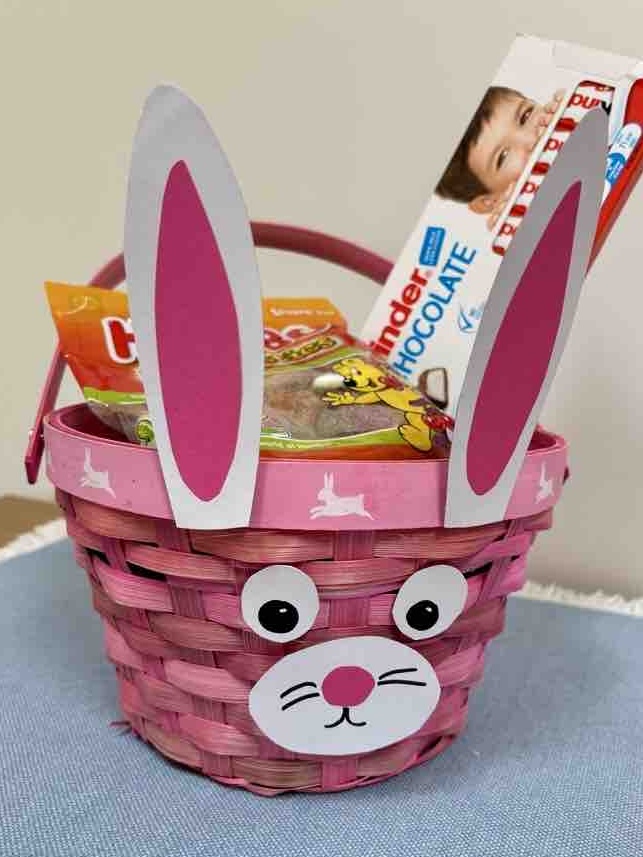
Cute and Easy DIY Easter Basket Bunny Craft For Kids
Easter is right around the corner, and if you’re anything like me, you’re probably already thinking about how to make the holiday extra special for your little ones. There’s something magical about Easter. The excitement of Easter egg hunt, pastel colors everywhere, and of course, the Easter bunny! One of the best parts is, hands down, the Easter basket. If you’ve been wanting to add a personal, crafty touch to your Easter celebrations, I’ve got the perfect project for you: an Easter basket bunny craft!
I know, I know. You might be thinking, “I’m not crafty!” or “I don’t have the time.” But trust me, this Easter basket bunny craft is as simple as it gets. It’s a great way to get creative with kids of all ages, and it’s an adorable project that will have them excited to fill up their own baskets. And you don’t need to be a Pinterest pro to make it happen. With just a few basic supplies and some easy-to-follow instructions, you can create a cute, custom bunny basket that will make your Easter celebration even more memorable.
The Easter basket tradition is something many of us grew up with
It’s a beautiful way to celebrate the season of renewal. Maybe your kids wake up on Easter morning to find their Easter baskets filled with Easter gifts like candy, chocolate eggs, and little surprises from the Easter bunny. Or maybe you’re like our family, where the Easter bunny hides their gifts outside, to be searched for after Easter Sunday breakfast. Whichever tradition you follow, cute crafts are the best part of any holiday.
So let’s dive in and get started on this Easter basket craft. Turning them into adorable bunnies is such an easy way to turn the baskets into something truly special. Your little ones will have so much fun designing their own little bunnies. And you can even use them as Adult Easter Baskets also!
How to Make an Easy Easter Basket
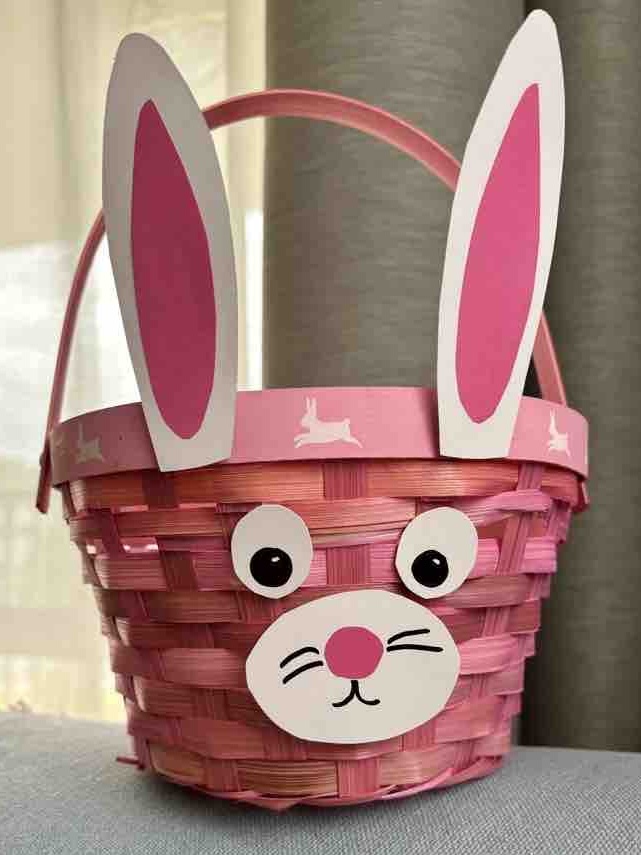
Making an adorable Easter bunny basket from scratch can seem a little daunting, but I promise it’s actually a lot easier than it looks. Whether you want to make a small, personal basket for each of your kids or just one larger one to fill with treats, this Easter basket bunny craft will be a simple and satisfying way to celebrate Easter.
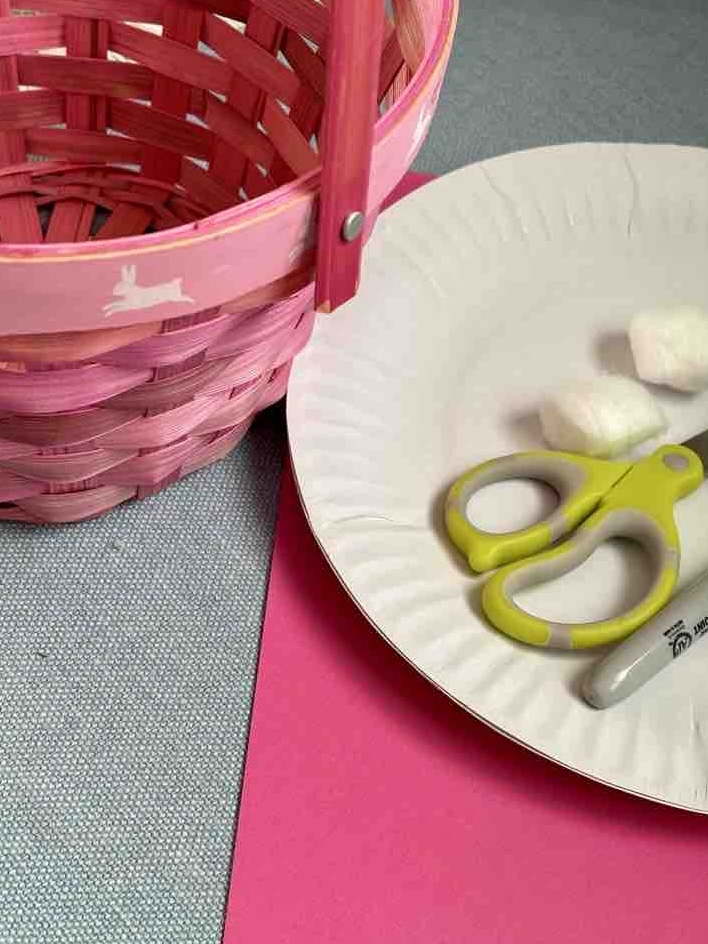
Supplies You’ll Need
A plain wooden basket (or any small basket you can find at a craft store or dollar store)
White paper plates or paper cup (for bunny ears and tail)
Pink construction paper or felt (for inner ear details)
Scissors
Hot glue gun (or tacky glue if you prefer)
Googly eyes – plastic or drawn on paper
Cotton ball (for the bunny tail)
A black marker or small pink pom-pom (for the bunny’s nose)
Ribbon or twine (for added decoration)
A few pastel-colored Easter eggs, small toys, or chocolate eggs (to fill the basket)
How to Assemble this Easter Basket Bunny Craft
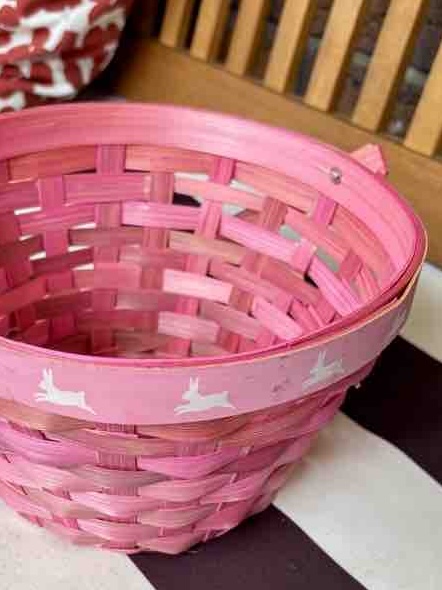
Prepare the Basket. Start with your basic basket. You can find a simple, inexpensive woven basket, which will be your base. If you prefer, you can even use a plain paper-mâché basket and paint it in pastel shades, but I’ll keep things super simple for this craft!
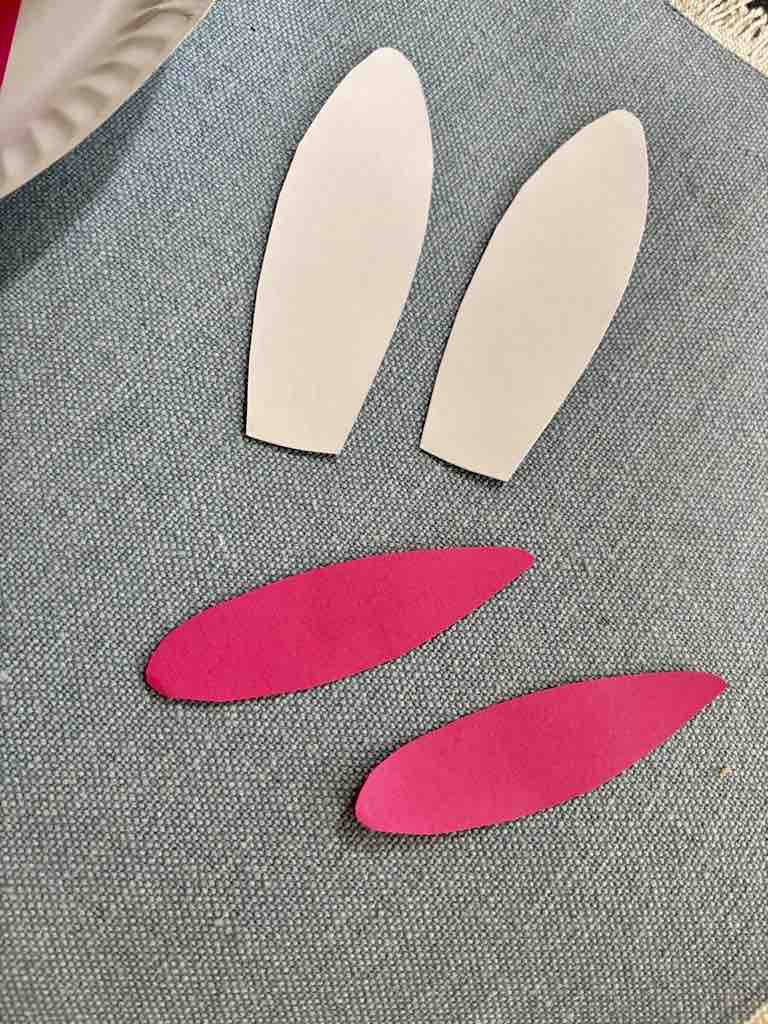
Cut Out the Bunny’s Ears. Using the white paper plates or cups, cut two large ear shapes (about 4-5 inches long). Then, cut out smaller pieces of pink paper or felt to create the inner part of the ears. Glue the pink pieces onto the larger white ears. You can even make the ears extra fun by adding a little curve or fold to them to give them some dimension!
Assemble
Attach the Ears. Use a hot glue gun (or regular glue) to attach the bunny ears to the inside of the basket. Position them on either side of the basket, letting them peek out just a little. These ears will be the focal point of your bunny basket, so feel free to get creative with their shape and placement!
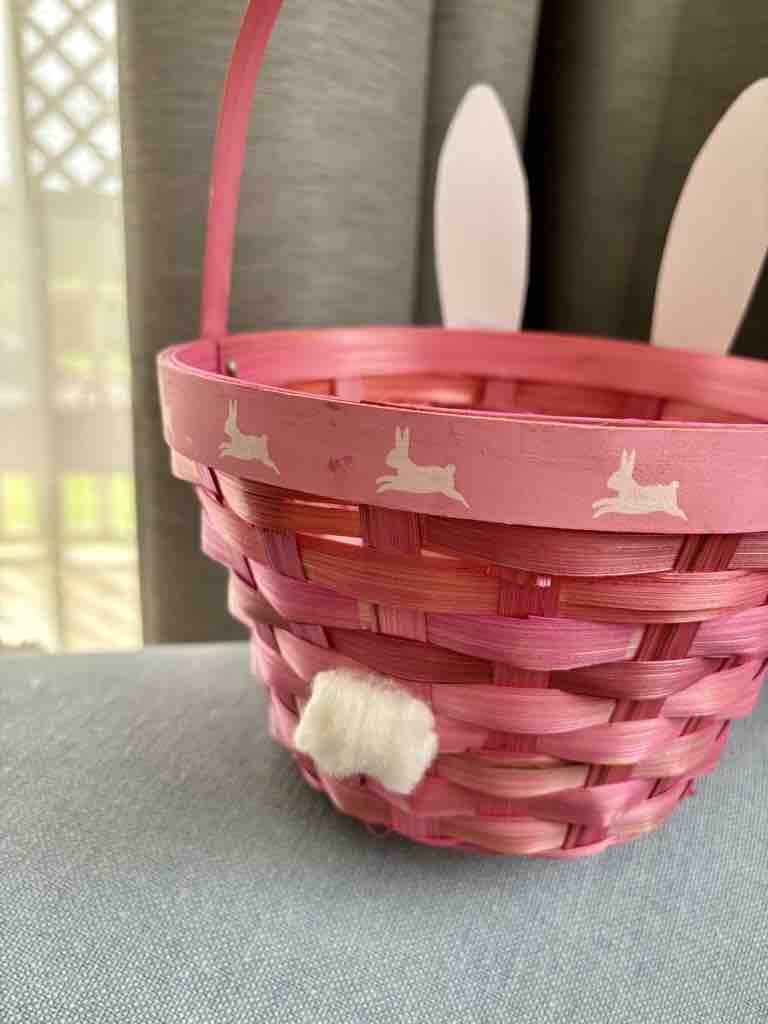
Add the Bunny Tail. Take a cotton ball and glue it to the back of the basket for the bunny’s fluffy tail. This little detail adds so much charm to your Easter basket bunny craft, and it’ll make the basket look extra adorable.
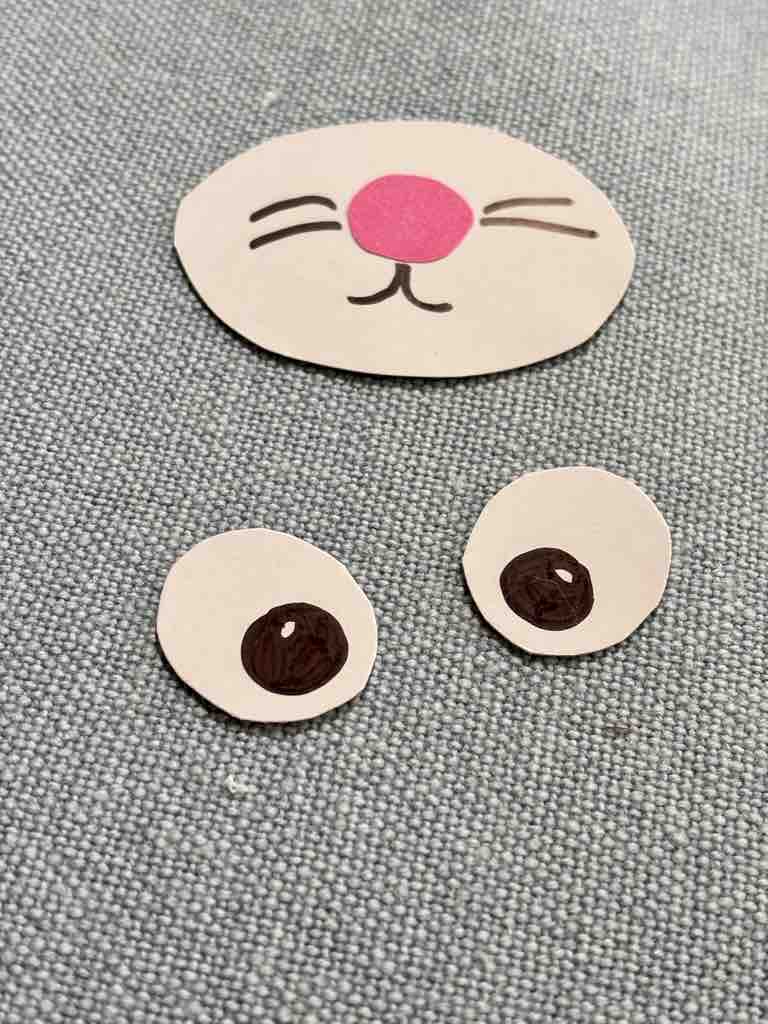
Make the Bunny Face. Next, glue on the googly eyes right in the center of the basket. For the nose, use a small pom-pom or a dot made from a black marker. You can also draw or glue on a little smile to complete your bunny’s face.
Add Finishing Touches. You can add extra decorations like ribbons or twine around the handle of the basket or even glue small pastel-colored flowers on the sides. The possibilities are endless – just let your creativity run wild!
Fill Your Basket. Once your Easter basket bunny craft is complete, it’s time to fill it with Easter treats! Whether it’s Easter candies, small toys, or other creative ideas, your little one will be thrilled to have their very own Easter basket to collect all the Easter treasures.
Tips and Tricks
If you’re working with younger kids, let them help with the gluing and decorating. They’ll love getting involved and adding their own personal touches to the craft!
Want to make this Easter crafting project even more special? Personalize the bunny baskets by adding your child’s name on the front using stickers or a cute tag.
If you don’t have a hot glue gun, craft glue or even a glue stick will work just fine for this project.
Don’t worry about perfection. Each bunny basket will have its own charm, and that’s what makes it so special!
What to Avoid Doing
Be careful with the glue gun! It gets super hot, so keep this task for the older kids.
Don’t overcomplicate the craft. This is all about simple, wholesome fun. Keep it easy and stress-free!
Avoid using too many decorations. Sometimes less is more, and letting the bunny features shine is what makes this craft so cute.
I hope you and your little ones enjoy making this Easter basket bunny craft together. It’s a fun and easy way to add some creativity and love to your Easter celebrations. Make sure to snap a picture and share it in the comments!
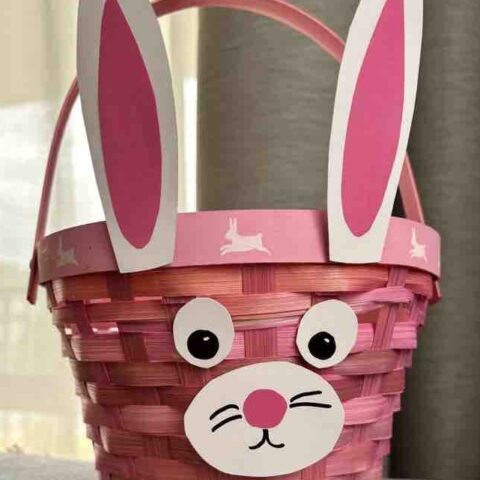
Easter Basket Bunny Craft
Add a personal, crafty touch to your Easter celebrations.
Materials
- A plain wooden basket (or any small basket)
- White paper plates or paper cup
- Pink construction paper or felt
- Googly eyes
- Cotton ball
- A black marker or small pink pom-pom
- Ribbon or twine
- A few pastel-colored Easter eggs, small toys, or chocolate eggs
Tools
- Scissors
- Hot glue gun (or tacky glue if you prefer)
Instructions
Prepare the Basket. Start with your basic basket. You can find a simple, inexpensive woven basket, which will be your base. If you prefer, you can even use a plain paper-mâché basket and paint it in pastel shades, but I’ll keep things super simple for this craft!
Cut Out the Bunny's Ears. Using the white paper plates or cups, cut two large ear shapes (about 4-5 inches long). Then, cut out smaller pieces of pink paper or felt to create the inner part of the ears. Glue the pink pieces onto the larger white ears. You can even make the ears extra fun by adding a little curve or fold to them to give them some dimension!
Attach the Ears. Use a hot glue gun (or regular glue) to attach the bunny ears to the inside of the basket. Position them on either side of the basket, letting them peek out just a little. These ears will be the focal point of your bunny basket, so feel free to get creative with their shape and placement!
Add the Bunny Tail. Take a cotton ball and glue it to the back of the basket for the bunny’s fluffy tail. This little detail adds so much charm to your Easter basket bunny craft, and it’ll make the basket look extra adorable.
Make the Bunny Face. Next, glue on the googly eyes right in the center of the basket. For the nose, use a small pom-pom or a dot made from a black marker. You can also draw or glue on a little smile to complete your bunny’s face.
Add Finishing Touches. You can add extra decorations like ribbons or twine around the handle of the basket or even glue small pastel-colored flowers on the sides. The possibilities are endless – just let your creativity run wild!
Fill Your Basket. Once your Easter basket bunny craft is complete, it’s time to fill it with Easter treats! Whether it’s Easter candies, small toys, or other creative ideas, your little one will be thrilled to have their very own Easter basket to collect all the Easter treasures.
Notes
- If you’re working with younger kids, let them help with the gluing and decorating. They’ll love getting involved and adding their own personal touches to the craft!
- Want to make this Easter crafting project even more special? Personalize the bunny baskets by adding your child’s name on the front using stickers or a cute tag.
- If you don’t have a hot glue gun, craft glue or even a glue stick will work just fine for this project.
- Don’t worry about perfection. Each bunny basket will have its own charm, and that’s what makes it so special!