Easy hot wheels birthday cake design for kids party
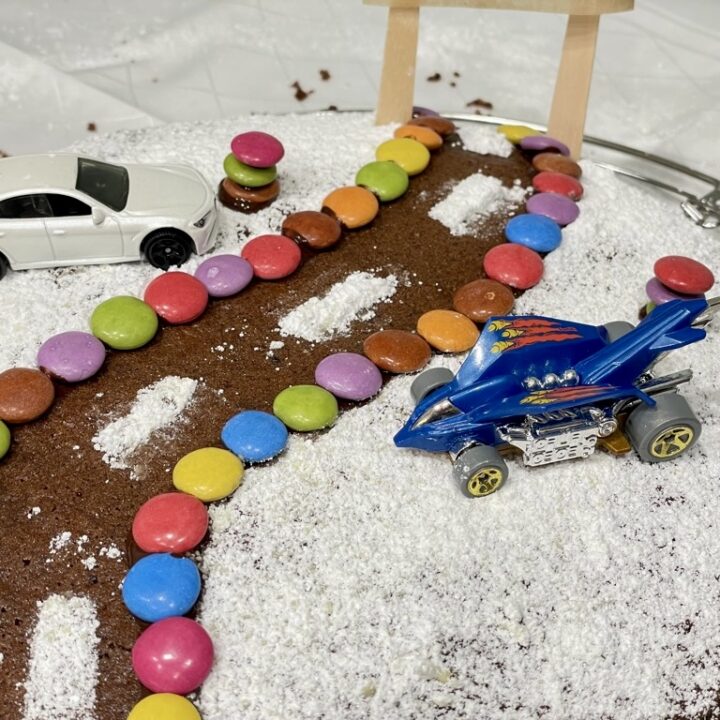
With birthday party season being around the corner at some point of the year, this easy hot wheels birthday cake design will take the stress out of prep day. Made with ingredients all children love, this super simple design is quick and easy to prepare and won’t require much preparations whatsoever.
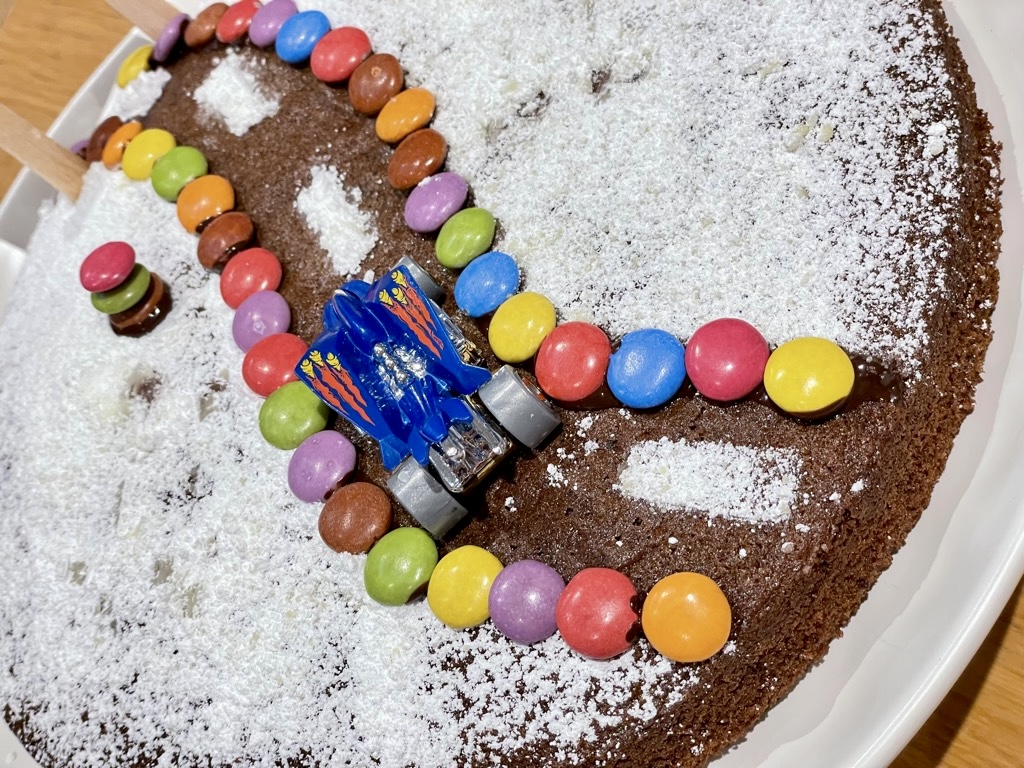
If your kids are anything like mine, they will eventually go through their hot wheels phase. These fun, fast cars come with all different race tracks and ramps to entertain for hours. I remember when my girls got their first set of hot wheels, racing each other was all the hype. As they outgrew the simple pushing of their little speed mobiles, we slowly moved to into ramps. All different kinds of ramps that is. First, cars were launched down the staircase, later on we invested in an actual hot wheels ramp what catapulted a range of rainbow coloured vehicles from the dining table, over the couch and into the dog bed. What a blast!
I always bake our birthday cakes from scratch. But my kids eventually became quite demanding when it came to the designs they were after. And unlike us grown ups, who often appreciate a multi layer cake with lots of flavours and cream base filling, my girls detest most of these fancier components. So while I was thinking of how to spice up a plain bit of chocolate cake with a few simple sugary favourites, I came up with this easy hot wheels birthday cake design.
I still remember the first time my girls saw the cake. I had baked their favourite chocolate cake, topped it with powdered sugar and their favourite – stacks of smarties. Chocolate covered with more chocolate and sugar – amazing! As expected, the first attempt went down an absolute treat and was gone within hours.
So let me share this easy hot wheels birthday cake design with you to try yourself. The birthday boy (or girl) can thank me later 🙂
Cake recipes to try
Decorations are great, but what about the cake? Try one of my delicious cake recipes to make your next event a success:
Other sweet treats you may like
Sourdough Oatmeal Choc Chip Cookies
Almond Flour Shortcut Biscuits
Tools you will need
A cake stand with all round access
Parchment paper
Scissors
Sieve or flour sifting cup
Small saucepan to melt your chocolate
Small spoon
Two shashlik sticks
Plain paper
Sticky tape
Black pen
Hot wheels cars
Ingredients
Single layer cake
Powdered sugar
Chocolate to melt
Smarties or M&Ms
How to create this easy hot wheels birthday cake design from scratch
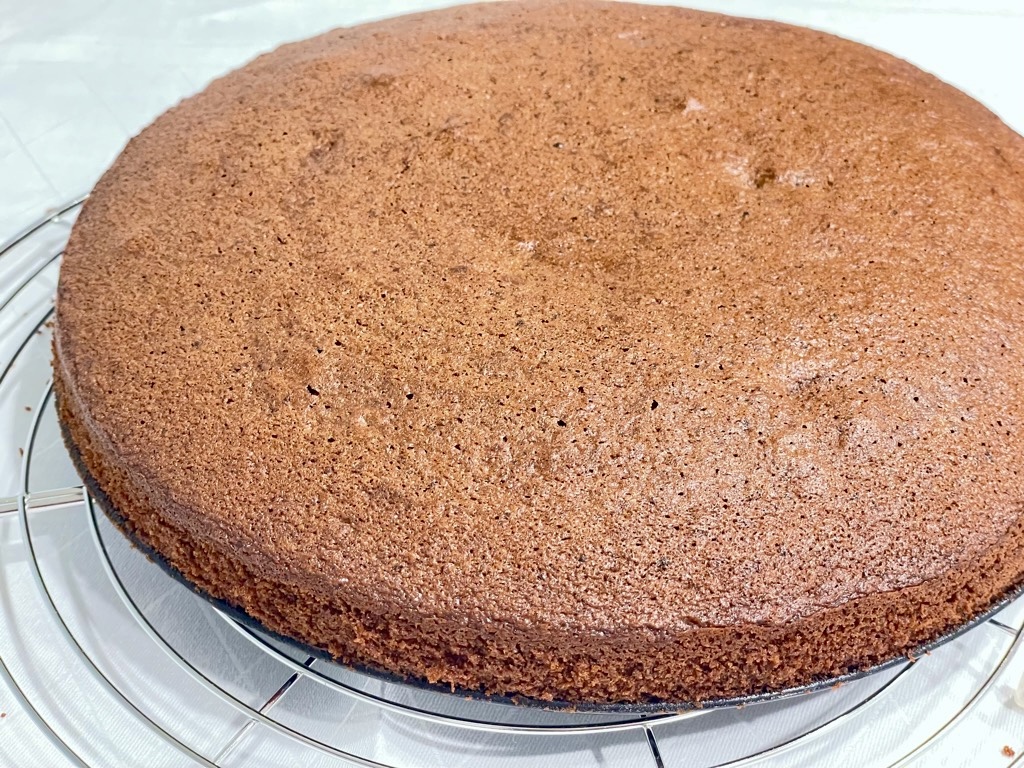
This easy hot wheels birthday cake design will work with most cakes with a flat surface. Depending on your child’s preferences, bake their favourite flavoured, single layer cake. I would recommend you to make a darker cake like chocolate, as the contrast of white powdered sugar on chocolate cake is much nicer than using a light vanilla cake. For our family I mostly use a simple chocolate based cake recipe. Whether you use a round or square shape doesn’t really matter for this cake design, just use whatever you have available.
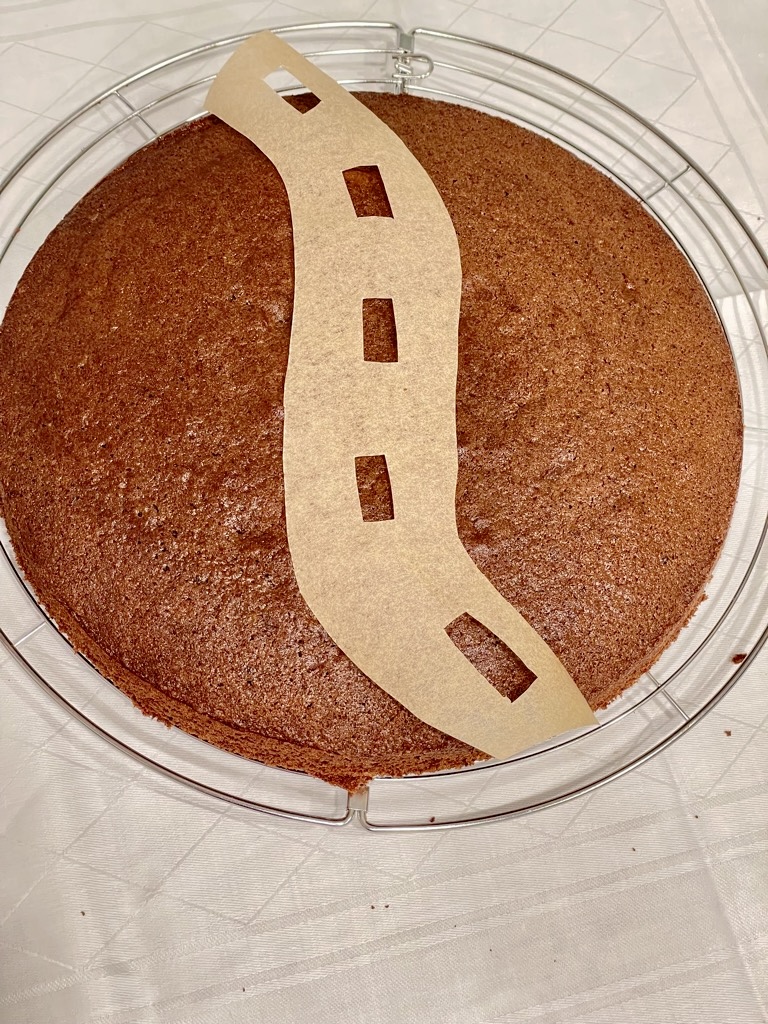
The first step to creating this easy hot wheels cake design is to cut out the shape of the race track. Using a piece of parchment paper and scissors, cut out a piece of “road”, about 5cm wide. Keep in mind that you are covering the road, not the surroundings, so take your time with this step. Using your scissors, cut a thick wave out of your parchment paper. Try to keep an even thickness and ensure the wave is long enough to reach across the full length of cake.
Placing the stencil
Once you have your waved piece of paper road, cut a few lines out of the middle to create the design of two lanes. You may be best to drew these dividing lines on the paper first and then cut them with a small pair of scissors. In my first design I started cutting free-handedly, which resulted in a very uneven design.
Next, place your road design over the middle of your cake. If possible, place your cake onto a cake stand already so you don’t have to transfer it later on. Ensure there is no open window nearby that could blow the stencil off. If in doubt, secure it with a light weight like a knife or a meter straw.
Fill a few heaped tablespoons of powdered sugar in your sieve or flour sifting cup. Cover the entire cake in powdered sugar, ensuring that you have an even, white layer and your stencil has not moved.
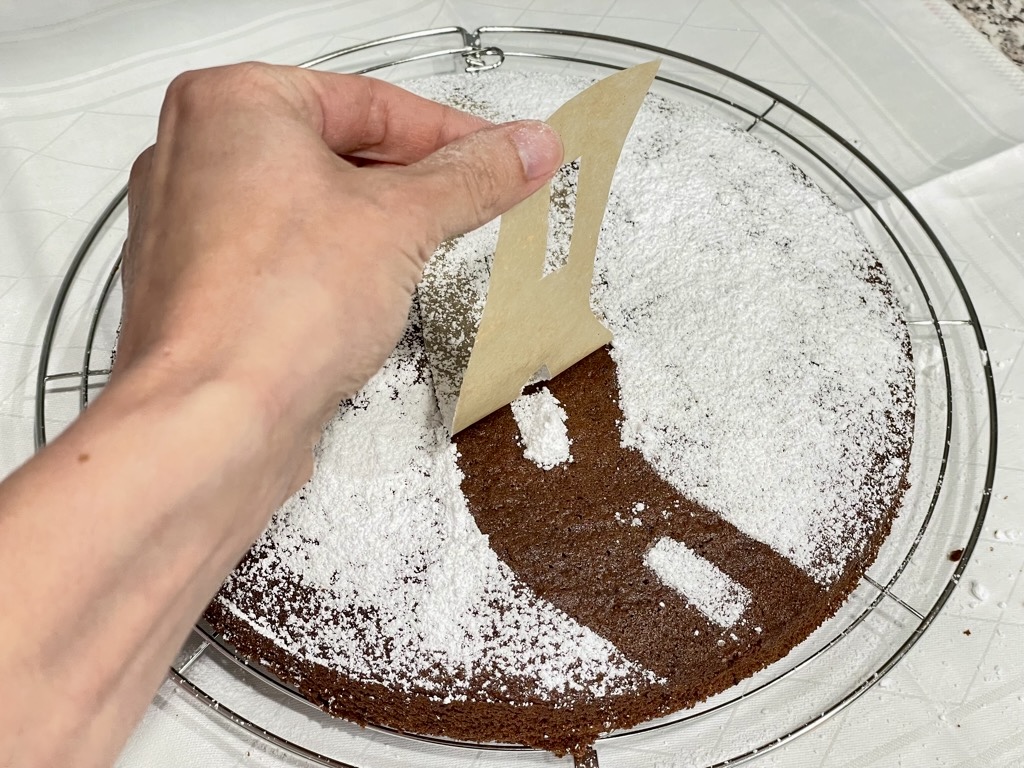
Gently remove the stencil by lifting it off the cake vertically. Be careful not to slide the stencil, as this will mess up the powdered sugar lined you created.
Laying the road
Next up, melt a little chocolate in a small saucepan or the microwave. Tip your smarties in a bowl for easy access.
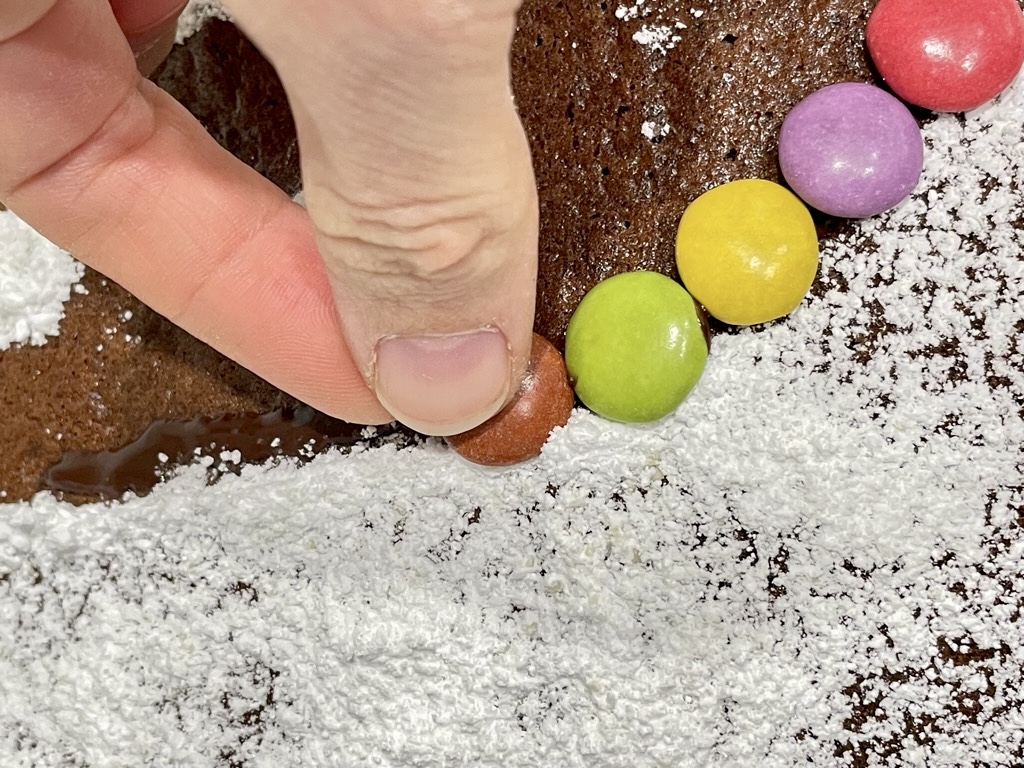
Using a small spoon, drizzle a thin line of melted chocolate along the first edge of your road. Try to make the line fairly thin to keep it hidden under the smarties you are about to place.
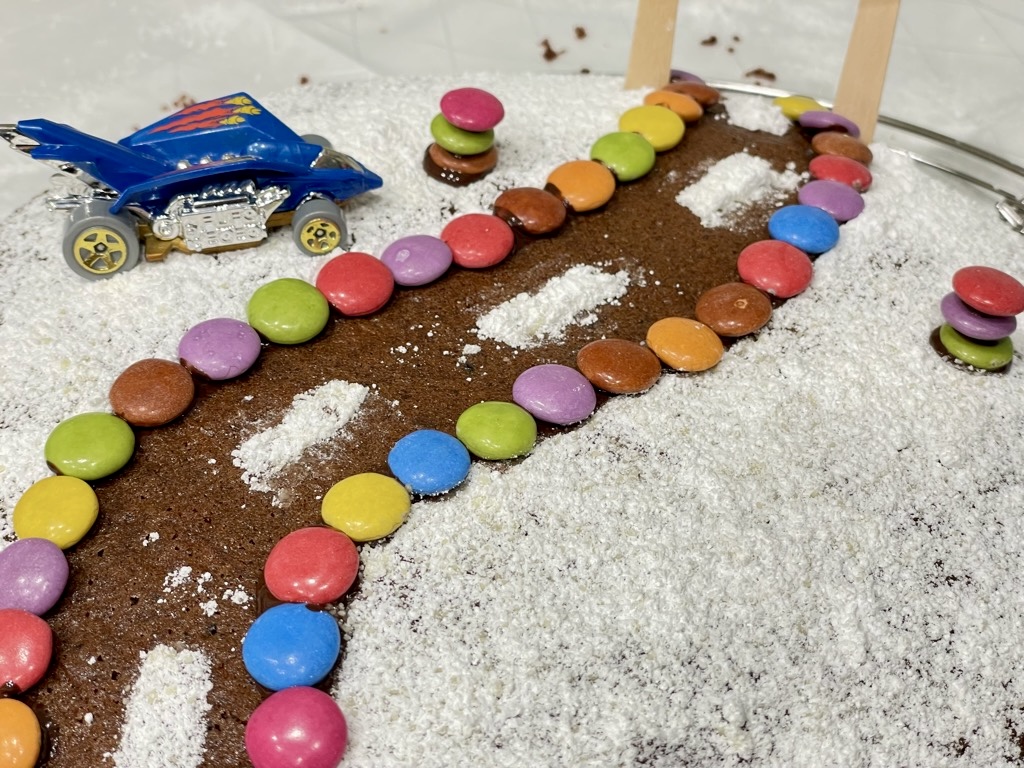
Place your smarties on top of the melted chocolate. Place one smarties next to the other in a tight line, following the curves of your road. If you are worried about the chocolate solidifying too fast, start with a small line of chocolate, place the smarties and place more melted chocolate along the edge of the road.
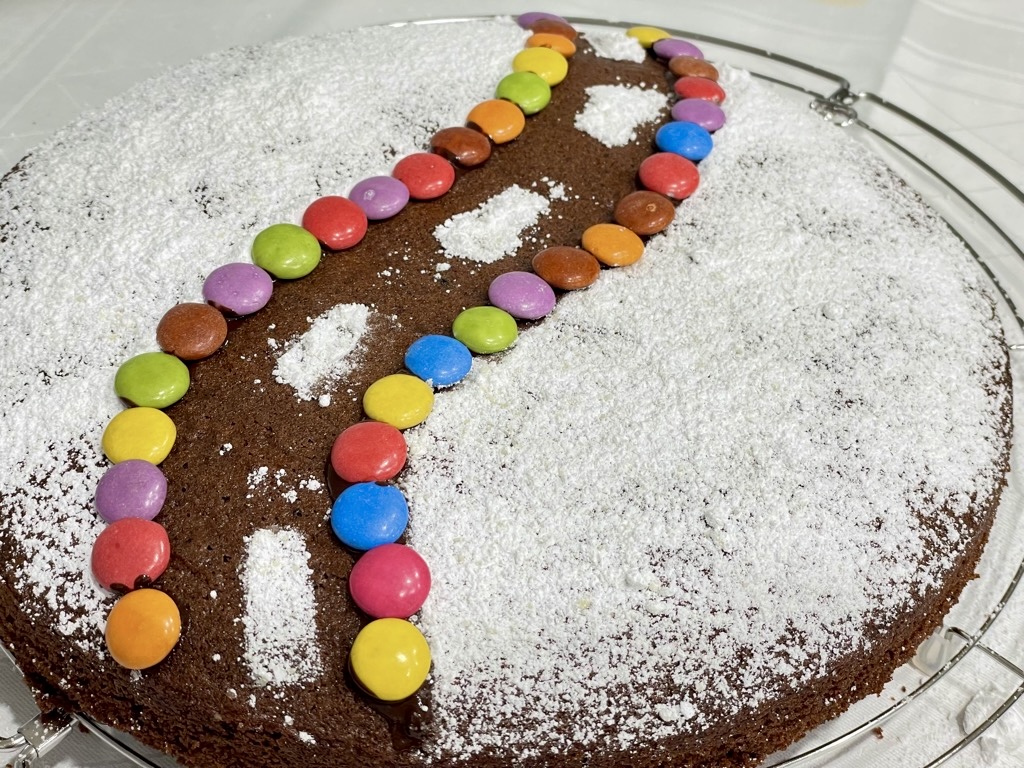
Repeat the process for your second edge until both sides of the road have been lined by smarties.
A few added details
Next, create a few tire stacks along the sides of your road. To ensure your smarties stick to one another, allow for your melted chocolate to solidify a little until it is quite sticky. This will prevent your smarties sliding off as you build your stack. Use a little bit of chocolate and place it on your cake. Add a smarties on top of it. Add a little chocolate on top of said smartie and place another smarties on top of it. Continue this process until you have a few tire stacks of 3-4 smarties each.
Almost done. The last thing to create is our finish sign. Take a piece of paper and cut it into a 6cm long strip, about 3cm wide. The strip should be a little longer than the width of your road. If your road is 5cm wide, cut a 6cm long strip of paper.
Using a black pen, write FINISH onto the piece of paper in block letters. You could also turn it into a checkered flag. Attach the paper’s edges to the two shashlik sticks using sticky tape. Stick your finish sign into the cake at the end of your road, ensuring the writing faces the road.
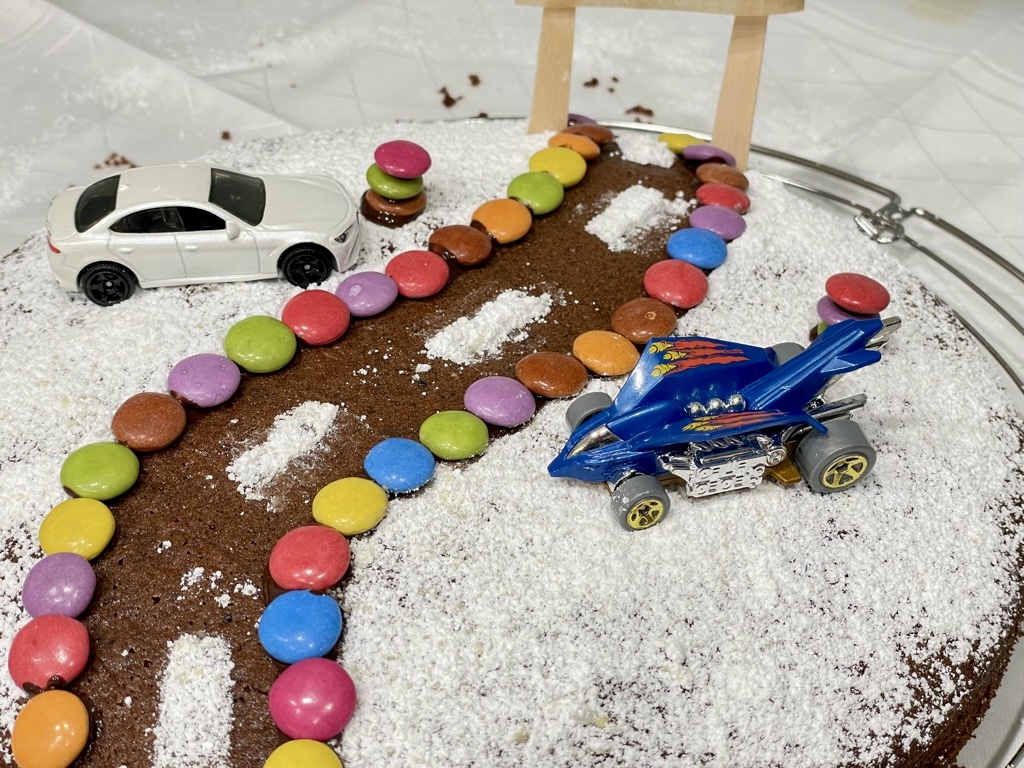
Place your hot wheels cars onto the cake, add a few birthday candles and enjoy!
…and for those super fussy party attendees, try my sourdough oatmeal cookies.
Useful tips and tricks
If you are making the cake ahead of time, leave the hot wheels cars or cake topper off the cake until serving. Their weight can eventually sink into the cake, leaving a few ugly marks.
To “freshen up” your cake on the day it’s being served, keep hold of your road stencil. On the day of the party, add another layer of powdered sugar over your cake to iron out uneven patches and give it a fresher look.
This easy hot wheels birthday cake design is perfect for single layer cakes. Saying this, don’t be shy to apply it to a tiered cake. For the ultimate effect, add a line of Oreo “tires” all around the base.
Frequently asked questions
How to decorate a cake for a child?
Decorating a cake for a child can be very easy, as long as we keep the child in mind. Having attended tons and tons of kids birthday parties over the past years, I found that most children will eat plain vanilla or chocolate cakes. Chocolates and gummy bears are always a hit. They will however most certainly refuse any cream filled cakes, frosting and anything where flavours and consistencies have been mixed together. Think along the lines of a crunchy raspberry vanilla cream.
So with the child in mind, use simple ingredients they would also eat on their own, like smarties, sprinkles, gummy bears or similar. Using melted chocolate to hold decorations in place is often all you need. To spice things up, add a little powdered sugar.
What type of cake is easiest to decorate?
In my experience, any cake with a firm consistency is great for decorating. Having a solid cake base will allow you to add a little weight by using frosting, smarties or other decorations without having to worry about the cake’s consistency. If you are decorating a very light, delicate cake, think about using light weight decorations such as flowers or sprinkles, instead of heavy toppers and chocolate.
How to decorate a birthday cake at home without tools?
Decorating a birthday cake at home without tools is entirely possible. While specialty tools often make the job easier, think about what they are and intend to achieve. A cake stand is nothing more than an elevated plate with easy access to all sides of the cake. Any other flat plate on an elevated surface will do the job for this. To spread icing over your cake, use a spoon or a silicone spatula or scraper to begin with. If your cake is still not smooth enough, use another flat edge like a ruler or the back of a bread knife to polish out uneven spots. Thinking about the shape of device and what it intends to achieve often allows you to see many similar tools your household already has available.
What type of cake is best for birthday cake?
The best type of cakes to decorate are those with a fairly solid, flat surface and consistency. Most layered cakes will use some type of sponge cake. In my experience, any recipe targeted at children is usually ideal for decorating. Kids are often fussy when it comes to consistencies and prefer solid, simple flavours. These are ideal for decorating and are generally speaking pretty sturdy and easy to handle.
How to decorate cake without cake stand?
Decorating a cake without a cake stand can easily be achieved. At the end of the day, a cake stand is an elevated, flat surface that gives you easy access to all sides of a cake. Using another type of flat surface like a large plate or tray usually does the trick. To elevate, flip a large bowl with a flat surface upside down and place your flat pate on top of it. Any other large container will also do the trick.
One thing to consider is whether or not your cake needs to be moved after decorating. If possible, place it on the plate it will be served on to avoid any accidents after putting all this hard work in.
Easy Hot Wheels Birthday Cake Design
Made with ingredients all children love, this easy hot wheels birthday cake design is quick and simple to prepare and won’t require much preparations whatsoever.
Materials
- Single layer cake
- Powdered sugar
- Chocolate to melt
- Smarties or M&Ms
Tools
- A cake stand with all round access
- Parchment paper
- Scissors
- Sieve or flour sifting cup
- Small saucepan to melt your chocolate
- Small spoon
- Two shashlik sticks
- Plain paper
- Sticky tape
- Black pen
- Hot wheels cars
Instructions
- This easy hot wheels birthday cake design will work with most cakes with a flat surface. Depending on your child’s preferences, bake their favourite flavoured, single layer cake. I would recommend you to make a darker cake like chocolate, as the contrast of white powdered sugar on chocolate cake is much nicer than using a light vanilla cake. For our family I mostly use a simple chocolate based cake recipe. Whether you use a round or square shape doesn’t really matter for this cake design, just use whatever you have available.
- The first step to creating this easy hot wheels cake design is to cut out the shape of the race track. Using a piece of parchment paper and scissors, cut out a piece of “road”, about 5cm wide. Keep in mind that you are covering the road, not the surroundings, so take your time with this step. Using your scissors, cut a thick wave out of your parchment paper. Try to keep an even thickness and ensure the wave is long enough to reach across the full length of cake.
- Once you have your waved piece of paper road, cut a few lines out of the middle to create the design of two lanes. You may be best to drew these dividing lines on the paper first and then cut them with a small pair of scissors. In my first design I started cutting free-handedly, which resulted in a very uneven design.
- Next, place your road design over the middle of your cake. If possible, place your cake onto a cake stand already so you don’t have to transfer it later on. Ensure there is no open window nearby that could blow the stencil off. If in doubt, secure it with a light weight like a knife or a meter straw.
- Fill a few heaped tablespoons of powdered sugar in your sieve or flour sifting cup. Cover the entire cake in powdered sugar, ensuring that you have an even, white layer and your stencil has not moved.
- Gently remove the stencil by lifting it off the cake vertically. Be careful not to slide the stencil, as this will mess up the powdered sugar lined you created.
- Next up, melt a little chocolate in a small saucepan or the microwave. Tip your smarties in a bowl for easy access.
- Using a small spoon, drizzle a thin line of melted chocolate along the first edge of your road. Try to make the line fairly thin to keep it hidden under the smarties you are about to place.
- Place your smarties on top of the melted chocolate. Place one smarties next to the other in a tight line, following the curves of your road. If you are worried about the chocolate solidifying too fast, start with a small line of chocolate, place the smarties and place more melted chocolate along the edge of the road.
- Repeat the process for your second edge until both sides of the road have been lined by smarties.
- Next, create a few tire stacks along the sides of your road. To ensure your smarties stick to one another, allow for your melted chocolate to solidify a little until it is quite sticky. This will prevent your smarties sliding off as you build your stack. Use a little bit of chocolate and place it on your cake. Add a smarties on top of it. Add a little chocolate on top of said smartie and place another smarties on top of it. Continue this process until you have a few tire stacks of 3-4 smarties each.
- Almost done. The last thing to create is our finish sign. Take a piece of paper and cut it into a 6cm long strip, about 3cm wide. The strip should be a little longer than the width of your road. If your road is 5cm wide, cut a 6cm long strip of paper.
- Using a black pen, write FINISH onto the piece of paper in block letters. You could also turn it into a checkered flag. Attach the paper’s edges to the two shashlik sticks using sticky tape. Stick your finish sign into the cake at the end of your road, ensuring the writing faces the road.
- Place your hot wheels cars onto the cake, add a few birthday candles and enjoy!
Notes
- If you are making the cake ahead of time, leave the hot wheels cars or cake topper off the cake until serving. Their weight can eventually sink into the cake, leaving a few ugly marks.
- To “freshen up” your cake on the day it’s being served, keep hold of your road stencil. On the day of the party, add another layer of powdered sugar over your cake to iron out uneven patches and give it a fresher look.
- This easy hot wheels birthday cake design is perfect for single layer cakes. Saying this, don’t be shy to apply it to a tiered cake. For the ultimate effect, add a line of Oreo “tires” all around the base.
